Setting up SITL on Linux
This page describes how to setup the SITL (Software In The Loop) on Linux. The specific commands were tested on Ubuntu from 12.10 to 18.04.
Overview
The SITL simulator allows you to run Plane, Copter or Rover without any hardware. It is a build of the autopilot code using an ordinary C++ compiler, giving you a native executable that allows you to test the behaviour of the code without hardware.
SITL runs natively on Linux and Windows. See the separate windows installation page for a windows install.
Install steps
Please follow the instructions in Setting up the Build Environment (Linux/Ubuntu) to set up the full environment, including SITL.
Start SITL simulator
To start the simulator first change directory to the vehicle directory. For example, for the multicopter code change to ardupilot/ArduCopter:
cd ardupilot/ArduCopter
Then start the simulator using sim_vehicle.py. The first time you run it you should use the -w option to wipe the virtual EEPROM and load the right default parameters for your vehicle.
sim_vehicle.py -w
After the default parameters are loaded you can start the simulator normally. First kill the sim_vehicle.py you are running using Ctrl-C. Then:
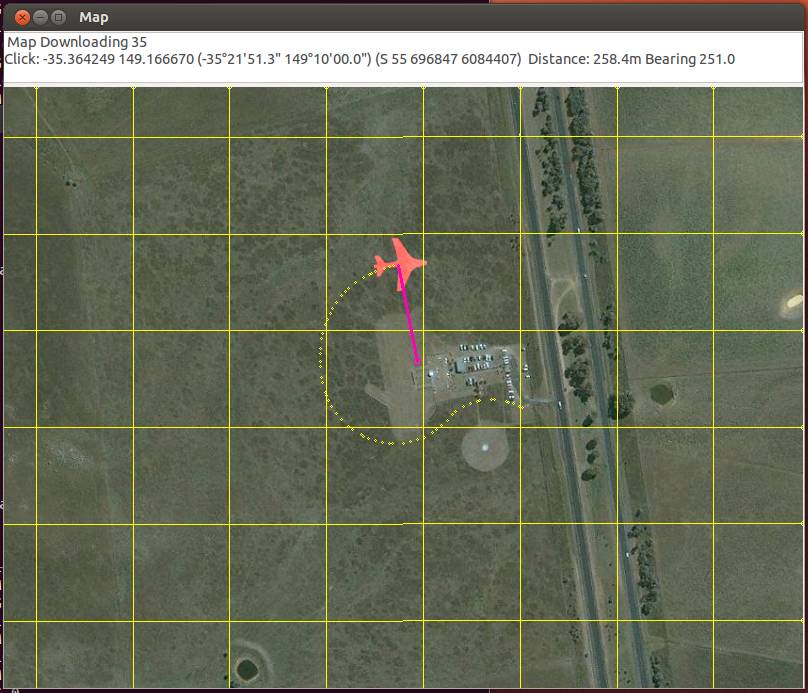
sim_vehicle.py --console --map
Tip
sim_vehicle.py
has many useful options, ranging from setting the simulation speed
through to choosing the initial vehicle location. These can be listed by
calling it with the -h flag (and some are demonstrated in Using SITL for ArduPilot Testing).
Tip
If the map tiles don’t load, you can temporarily change the map provider in the map window by clicking View/Service. To keep the new map service between launches, add the following lines to the end of your “.bashrc” (change MicrosoftHyb to the provider you want):
export MAP_SERVICE="MicrosoftHyb"
Learn MAVProxy
To get the most out of SITL you really need to learn to use MAVProxy. Have a read of the MAVProxy documentation. Enjoy flying!
Updating MAVProxy and pymavlink
New versions of MAVProxy and pymavlink are released quite regularly. If you are a regular SITL user you should update every now and again using this command
pip install --upgrade pymavlink MAVProxy --user
FlightGear 3D View (Optional)
Developers can optionally install the FlightGear Flight Simulator and use it (in view-only mode) to display a 3D simulation of the vehicle and its surroundings. This provides a much better visualization than the 2D maps and HUD flight displays provided by MAVProxy and Mission Planner.
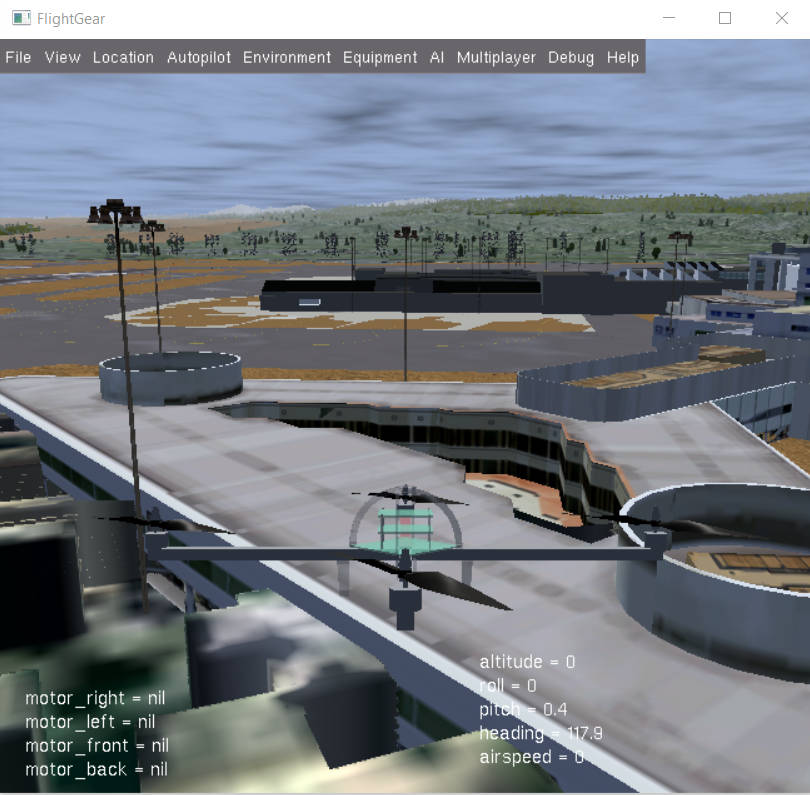
FlightGear:Simulated Copter at KSFO (click for larger view).
SITL outputs FlightGear compatible state information on UDP port 5503. We highly recommend you start FlightGear before starting SITL (although this is not a requirement, it has been found to improve stability in some systems).
The main steps (tested on Ubuntu Linux 14.04 LTS) are:
Install FlightGear from the terminal:
sudo apt-get install flightgear
Open a new command prompt and run the appropriate shell file for your vehicle in /ardupilot/Tools/autotest/: fg_plane_view.sh (Plane) and fg_quad_view.sh (Copter).
This will start FlightGear.
Start SITL in the terminal in the normal way. In this case we’re specifying the start location as San Francisco airport (KSFO) as this is an interesting airport with lots to see:
sim_vehicle.py -L KSFO
Note
FlightGear will always initially start by loading scenery at KSFO (this is hard-coded into the batch file) but will switch to the scenery for the simulated location once SITL is started.
Tip
- If the vehicle appear to be hovering in space (no
scenery) then FlightGear does not have any scenery files for the selected location. Choose a new location!
You can now takeoff and fly the vehicle as normal for Copter or Plane, observing the vehicle movement including pitch, yaw and roll.
Next steps
After installation, see Using SITL for ArduPilot Testing for guidance on flying and testing with SITL.